
Want to build a custom Amazon Storefront? The journey starts with one non-negotiable step: enrolling in Amazon Brand Registry. This isn't just a bureaucratic hoop to jump through; it's the master key that unlocks the Storefront builder and a whole suite of powerful brand protection tools. Once Amazon officially recognizes you as the brand owner, you get the keys to the kingdom.
Your Foundation for a High-Performing Storefront
Before you even dream about layouts, lifestyle images, and video tiles, you have to lay the groundwork. Securing your spot in Amazon Brand Registry is that foundation. Think of it like pouring the concrete for a new house—skip it, and everything you build on top will eventually crumble.
This process is what separates legitimate brand owners from the sea of third-party resellers. It’s your official declaration to Amazon that you own your brand and have the exclusive right to represent it. Getting that approval is what makes the "Stores" tab magically appear in your Seller Central account, giving you access to one of the most valuable brand-building tools on the platform.
Qualifying for Amazon Brand Registry
Getting into the program requires more than just a cool product and a logo. Amazon is strict because they want to protect the integrity of the brands on their platform. The single most important requirement is a fully registered, active trademark.
Here’s exactly what you need to have lined up before you even think about starting the application:
- An Active Registered Trademark: This needs to be a text-based (word mark) or image-based (design mark) trademark. The critical part? It must be officially registered and active with the government IP office in the country you're enrolling in. A "pending" application usually won't cut it.
- Brand Name Matching: Pay close attention here. The brand name on your trademark registration has to be an exact match for the brand name on your products and packaging. Even a minor difference like "MyBrand" versus "My-Brand" can get your application kicked back.
- Proof of Branding: You'll need to submit clear photos of your products and packaging that show your brand name permanently affixed. A simple sticker on a generic box is an instant red flag for Amazon. They want to see professional, integrated branding that looks like it belongs.
Getting these documents in order before you start is the best advice I can give. It prevents the dreaded, time-sucking back-and-forth with Amazon support that trips up so many sellers.
The Enrollment Workflow
Once you’ve got your paperwork ready, the enrollment process itself is pretty direct. You'll head to the Brand Registry portal and submit all your trademark details. Amazon’s team then cross-references this information with the corresponding government IP office and, once verified, sends a unique code to the contact on file for the trademark.
Here’s a practical step-by-step workflow:
- Gather Documents: Collect your active trademark registration number and high-resolution images of your product and packaging clearly showing your brand name.
- Log In: Go to the Amazon Brand Registry portal and sign in with your Seller Central credentials.
- Submit Information: Fill out the enrollment form, providing your trademark details and uploading your brand images.
- Verification: Amazon contacts the person listed on the trademark filing (often an attorney) with a verification code.
- Retrieve & Enter Code: Proactively contact your trademark correspondent to get this code, then enter it into the Brand Registry case log to finalize your enrollment.
After you plug that code in, your application goes into a final review. A successful approval gives you immediate access to the "Stores" tab in Seller Central, and from there, the real fun begins.
As you start building out your brand’s home on Amazon, don't forget that your individual product pages need to be just as compelling. To make sure your efforts are aligned, check out these tips on how to optimize your Amazon product listings. This foundational Brand Registry step isn't a hurdle—it’s your official entry ticket to building a genuine brand experience on the world's biggest marketplace.
A Practical Walkthrough of the Store Builder
Once you've cleared Brand Registry, the doors to the Amazon Store Builder swing open. Diving in for the first time can feel like a lot—you're met with a modular layout and a ton of options. But don't let that fool you; it's a surprisingly straightforward tool once you get the hang of its core pieces. This is where your brand’s vision finally starts to take shape on Amazon.
Your home base is the Store Manager dashboard. Think of it as your command center for spinning up new pages, tweaking existing ones, and keeping all your creative assets in one place. It’s built around a simple drag-and-drop system, but knowing what each element does is the difference between building a cohesive customer journey and just slapping together a digital catalog.
You'll spend most of your time working in three main areas: Pages, the Asset Library, and Settings. Pages are the individual "rooms" in your digital store. The Asset Library is your warehouse for all the images and videos. And Settings? That's the building's overall blueprint.
Navigating the Core Components
The Store Builder is all about a modular, tile-based system. You'll start by creating individual pages, which then get filled with different "content tiles." Every page you build automatically becomes a new tab in your Storefront's main navigation bar, creating a clear path for shoppers to follow your brand story and browse your products.
Here’s a workflow to get started:
- Create New Store: In Seller Central, navigate to
Stores > Manage Storesand click "Create Store." - Add Brand Details: Input your brand name and upload your brand logo.
- Create a Homepage: Provide a page meta description and select a page template. The 'Marquee' template is ideal for homepages.
- Build the Header: Design and upload a compelling header image that represents your brand.
- Add Content Tiles: Begin dragging and dropping content tiles from the right-hand menu to build out the page.
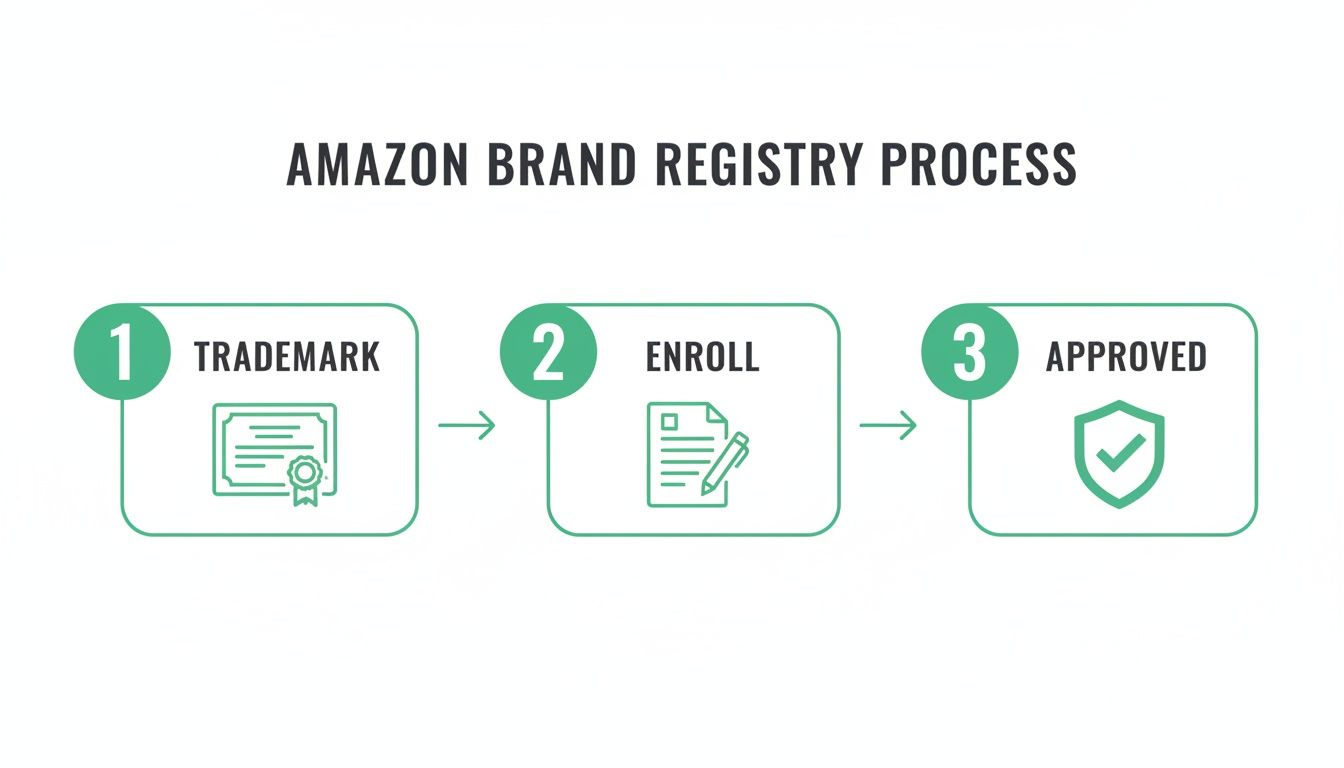
Remember, this simple process—trademark, enroll, approve—is the non-negotiable first step. It’s your golden ticket into the Store Builder we're walking through right now.
Building Your First Page from Scratch
Let's imagine we're building a homepage using that 'Marquee' template. First, you'll be asked for a page title and meta description—don't skip these, as they're crucial for SEO. Next up is the header or hero image. This is the very first thing your customer sees. Make it count.
Here’s a practical example workflow:
- Select Hero Image: Let's say you sell high-end coffee beans. Your hero image could be a killer shot of your beans being freshly ground. Upload this to the header section.
- Add a Tagline: Add a text overlay with a compelling tagline like, "Your Morning Ritual, Perfected." This immediately sets the tone.
- Add a Shoppable Image: Below the header, add a "Shoppable Image" tile. Use a lifestyle photo of someone enjoying your coffee. Click to add interactive "hotspots" on the coffee bag and the mug, linking each directly to its product detail page.
- Tell Your Story: Add a "Video" tile next, featuring a short video about your brand's origin or your ethical sourcing practices.
- Showcase Best-Sellers: Below the video, add a "Product Grid" tile and manually select your top 3 best-selling coffee blends to feature.
By adding sections and tiles in this logical order, you create an intuitive path for your shoppers. This workflow is how you turn a blank canvas into a powerful machine for storytelling and sales.
Designing Pages and Tiles That Actually Convert

Let's be clear: a great Amazon Storefront is much more than a digital product catalog. It's your chance to tell a story, build a connection, and guide shoppers from casual browsing to a confident "Add to Cart." This is where you separate your brand from the noise, turning a simple listing into a genuine brand experience.
Your homepage is your digital handshake. It needs to make an instant impression. A powerful hero image sets the tone, and from there, every single tile you add must have a purpose. Your job is to create a seamless journey that takes a shopper from "What's this?" to "I need this."
Choosing the Right Tiles for Your Story
Amazon gives you a solid toolkit of content tiles, and using the right mix is what creates a dynamic, engaging page. Some tiles are built for direct sales, while others are all about building trust and showing your products in the real world.
Think of it like building with LEGOs—each piece has a function, and how you put them together determines the final result.
Here are practical examples of how to use the most effective tiles:
- Shoppable Image Tile: A kitchenware brand showcases a beautifully set dinner table. Shoppers can click on the plates, wine glasses, or flatware in the image to go directly to those product pages. It's interactive and contextual.
- Video Tile: A company selling complex hiking gear uses a 30-second video showing their backpack being adjusted on a trail, instantly communicating its features, durability, and adventurous spirit.
- Product Grid Tile: A skincare brand creates a "Product Grid" for their "Morning Routine" collection, featuring a cleanser, serum, and moisturizer. This encourages bundling and simplifies the shopping process for customers.
Creating a Logical and Persuasive Page Flow
How you order your content is everything. A well-designed Storefront guides the customer's eye down the page, building interest and trust with every scroll. A classic mistake I see all the time is brands just dumping a massive product grid right below the header. It feels lazy and overwhelming.
Instead, build a narrative. Here’s a simple, effective flow for your homepage:
- Lead with a Strong Hero Image: Your main banner needs a captivating lifestyle shot paired with a short, benefit-driven tagline. If you sell skincare, show a person with radiant skin, not just a picture of the bottle.
- Introduce Your Brand or a Key Product: Right after the hero, drop in a video or a text tile that quickly explains what makes you different.
- Showcase Your Winners: Use a Product Grid to feature 3-4 of your top-performing products. This leverages social proof and points new visitors toward items that are already proven hits.
- Demonstrate with Lifestyle Content: Add a Shoppable Image or another video to show your products in use. Help customers see how your products fit into their lives.
- Build Out Your Categories: Use smaller image tiles with text overlays to act as visual navigation. These can link to other pages in your store, like "Shop All Coffee" or "Browse Our Bundles."
The best Storefronts master visual hierarchy. They use a mix of large, attention-grabbing images and smaller, focused content tiles to create a rhythm that keeps the user engaged and scrolling. It’s about making the shopping experience feel effortless and inspiring.
This is where you can lean on established e-commerce best practices to optimize the user experience from top to bottom. Thinking like a customer is key. The strategic placement of each tile can make or break how shoppers perceive your brand and whether they ultimately decide to buy.
For a deeper dive into turning clicks into customers, our guide on how to improve your ecommerce conversion rate is a great next step.
Essential Amazon Storefront Content Tiles
To make things even clearer, let's break down the most effective content tiles, their main job, and how you can put them to work.
| Content Tile Type | Primary Purpose | Practical Example |
|---|---|---|
| Hero Image/Video | Grab attention and establish brand identity. | A coffee brand uses a slow-motion video of espresso being poured. |
| Shoppable Image | Contextualize products and enable direct purchase. | A home decor brand shows a styled living room with tagged pillows and throws. |
| Product Grid | Curate and highlight specific product collections. | A tech accessory brand creates a grid for "Top Rated Phone Cases." |
| Video | Tell stories, demonstrate use, and build trust. | A pet food brand shows a short clip of happy, energetic dogs enjoying their product. |
| Image with Text | Guide navigation and promote categories. | An apparel brand uses three images to link to "Tops," "Bottoms," and "Outerwear." |
| Product Tile | Feature a single, high-priority product. | A brand highlights its newest, most innovative gadget with key specs. |
Using a thoughtful mix of these tiles allows you to create a page that's not just visually appealing but also strategically engineered to guide shoppers toward making a purchase.
Driving Traffic to Your Amazon Storefront
So you’ve built a stunning, perfectly organized Storefront. That’s a massive accomplishment, but honestly, it's only half the job. A beautiful store is completely useless if shoppers can't find it. Now it's time to shift your focus from design to discovery, creating clear pathways that lead customers straight to your branded experience.
The goal here is to stop hoping for random product searches and start actively pulling traffic to a central hub that you completely control. This means taking a two-pronged approach: optimizing for discovery within Amazon and promoting your store outside of Amazon. This strategy turns your Storefront into the main landing page for every single marketing effort you run.
On-Amazon SEO for Your Storefront
Just like your product listings, your Storefront pages can actually be optimized to show up in Amazon search results. While it’s not as direct as listing SEO, it’s a foundational step you absolutely shouldn't skip.
When you're setting up each page in the Store Builder, Amazon will prompt you to add a page title and a meta description.
Don't treat these as an afterthought. Here's a practical example:
- Bad Page Title: "Our Products"
- Good Page Title: "Shop Organic Cotton Baby Clothes & Essentials"
- Bad Meta Description: "See our stuff."
- Good Meta Description: "Discover our collection of GOTS-certified organic cotton baby clothes. Find soft, safe, and sustainable onesies, sleepwear, and gifts for your little one."
This simple bit of optimization helps your brand store gain visibility over time, creating a reliable, evergreen source of organic traffic.
Your Multi-Channel Promotion Strategy
Your Storefront gives you a powerful, clean, and shareable URL, which usually looks something like amazon.com/yourbrand. This little link is your golden ticket for all of your off-Amazon promotions. It needs to become a core part of your entire marketing ecosystem.
Let's be real, the Amazon marketplace is a beast. Prime Day alone pulled in a staggering $12.7 billion in sales, a crystal-clear sign of the platform's massive, engaged audience. With ecommerce on Amazon projected to capture 60% of all U.S. online sales, funneling external traffic to a professional Storefront isn't just a nice idea—it's essential for grabbing your piece of the market.
Actionable Workflows for Driving Traffic
Integrating your Storefront link into your existing marketing channels is what creates a smooth, cohesive brand journey for your customers. Here are some practical ways to put it to work.
Sponsored Brands Ads
Sponsored Brands ads are hands-down one of the most effective tools for this. Instead of linking a headline ad to a generic page of search results, you can point shoppers directly to a specific, curated page within your Storefront.
Workflow Example: Imagine you're launching a new summer apparel line.
- Create Page: Build a custom landing page in your Storefront titled "The Summer Collection," featuring only the new items.
- Launch Campaign: Create a Sponsored Brands ad campaign with a headline like "Effortless Styles for Sunny Days."
- Set Destination: In the ad settings, set the landing page to your new "Summer Collection" page instead of a product list.
Every click now lands on a highly relevant, curated collection, which dramatically improves the user experience and almost always boosts conversion rates.
Social Media Campaigns
That clean Storefront URL is perfect for your social media bios on platforms like Instagram and TikTok. You can—and should—also use it in specific posts and stories.
- Instagram Bio: Use a tool like Linktree to make your Storefront link the star of the show.
- TikTok Videos: Film a quick video showcasing your "Top 3 Amazon Finds" and tell viewers to hit the link in your bio to shop the whole collection.
- Facebook & Pinterest: Run targeted ad campaigns that drive traffic straight to a relevant category page in your store.
When you're running marketing campaigns to pull visitors to your Storefront, using a dedicated UTM Builder Tool is critical. It's the only way to accurately track where your traffic is coming from and what's actually working.
Email Marketing
Weave your Storefront into your email strategy. Don't just send emails linking to single products; promote your entire brand experience. Send out newsletters announcing new collections, seasonal promotions, or brand stories, and always include a big, clear call-to-action that drives subscribers to explore your Storefront.
By making your Storefront the central destination for both your paid and organic traffic, you build serious brand equity and gain far more control over the customer's journey. This can even supercharge your advertising results; you can learn more about that in our detailed guide on how to optimize PPC campaigns.
Using Data to Improve Storefront Performance
Once your Storefront is live, the real work begins. A lot of sellers make the mistake of treating their store as a "set it and forget it" project. That's a surefire way to leave money on the table.
Think of your Storefront as a living, breathing asset—one you can constantly fine-tune using hard data to turn casual browsers into loyal customers.
Amazon gives you the perfect tool for this: the Store Insights dashboard. This is where you graduate from guesswork and start making strategic decisions based on how real shoppers behave. Learning to read this data is what turns a simple brand page into a powerful sales engine.
Decoding Your Core Storefront Metrics
When you first open your Store Insights dashboard, you’ll see a handful of metrics that paint a picture of your store’s performance. Getting a handle on what each one means is the first step toward making meaningful improvements.
Here are the vitals you need to watch:
- Daily Visitors: This is the number of unique devices that dropped by your store on a given day. It’s a solid barometer of your overall traffic and reach.
- Views: This tracks the total number of page views within your store. If your views are way higher than your visitors, that's a great sign. It means people are engaged and clicking around to explore multiple pages.
- Sales: This shows the total product sales generated from visitors within 14 days of their visit. This is your bottom line—the ultimate measure of ROI.
- Units Sold: Simply put, this is the total number of products purchased by people who visited your store. Comparing this to your sales figure gives you a quick read on your average order value.
By keeping an eye on these numbers, you'll start to spot patterns. Did a big spike in visitors on Tuesday lead to a jump in sales on Wednesday? That’s a real insight you can build a strategy around.
Identifying Top Performers and Drop-Off Points
The real magic of Store Insights is that it doesn't just give you the big picture; it gets incredibly granular. The dashboard lets you drill down to see performance on a page-by-page and even product-by-product basis. This is where you can pinpoint exactly what’s working and what’s falling flat.
Practical example: You check your Insights and discover that your "Best Sellers" page is driving 80% of your total Storefront sales. Armed with that knowledge, you should immediately make that page more prominent in your navigation or even link directly to it from your Sponsored Brands ads.
On the flip side, maybe you see that your "About Us" page gets a ton of views but almost no clicks through to your products. That’s a classic drop-off point. It could mean your brand story isn’t connecting, or maybe there just isn't a clear call-to-action guiding visitors back to the shopping path.
A data-driven approach means you stop guessing what customers want and start listening to what their clicks are telling you. This feedback loop is what allows you to methodically optimize your customer journey for higher conversions.
Tracking Your External Marketing with Source Tags
Perhaps the most underrated feature in the Insights dashboard is the ability to track external traffic using source tags. These are just unique, trackable URLs you create to measure how effective specific marketing campaigns are.
Think about it: Amazon’s marketplace is huge, with over 300 million active customers worldwide. Success isn't just about being there; it's about understanding which of your efforts are actually bringing in the right people. Source tags give you that clarity. You can find more valuable information like this in the latest Amazon marketplace trends report.
Here's a step-by-step workflow for using source tags:
- Generate a Tagged URL: Inside the Store Insights dashboard, click "Create a source tag." Give it a descriptive name you'll recognize, like
tiktok_bio_linkorspring_email_promo. Amazon will generate a unique URL. - Use the URL: Now, place this unique link in the right spot. The
tiktok_bio_linkURL goes in your TikTok profile, and thespring_email_promoURL goes in your email newsletter. Simple. - Analyze the Results: Check back in a week. You can now filter your dashboard by that specific source tag to see exactly how many visitors, views, and—most importantly—sales each campaign delivered.
This process removes all the ambiguity. You'll know for a fact whether your Instagram influencer collaborations are outperforming your TikTok ads, letting you double down on what works and cut what doesn't.
Got Questions About Your Amazon Storefront?
Even with a step-by-step guide, you’re bound to have a few questions as you start building and running your brand’s Storefront. I hear these all the time from sellers who are just getting started, so let's clear up some of the most common hurdles.
How Long Does It Take for an Amazon Storefront to Be Approved?
Once you hit "submit for publishing," you're in for a little wait, but it's usually not too long. Amazon’s moderation review process typically takes about 24 to 72 hours.
Keep in mind, this timeframe can get a bit longer during the crazy Q4 holiday rush when everyone is updating their stores. During the review, Amazon's team is just making sure everything lines up with their creative acceptance policies—things like using high-res images, keeping your branding consistent, and not making any wild, unsupported claims about your products.
To avoid getting sent back to the drawing board, do a quick final review against Amazon's official guidelines before you submit. If you do get a rejection, don't sweat it. Amazon will usually give you a specific reason, like "low-quality image in hero slot," so you can make a quick fix and resubmit.
Can I Link My Storefront from Social Media?
Yes, and if you’re not doing this, you're missing a huge opportunity. Your Storefront gives you a clean, simple URL (like amazon.com/yourbrand) that’s perfect for driving traffic from all your other marketing channels.
This link is the perfect bridge to connect your social media followers with a curated, branded shopping experience right on Amazon. You should be dropping this link everywhere:
- TikTok or Instagram Bio: Use a "link in bio" tool to make your Storefront URL easy to find.
- Email Signatures: A simple, clickable "Shop Our Amazon Store" can work wonders.
- QR Codes: Put a QR code on your product packaging or inserts. It's a great way to guide customers directly to your store to reorder or check out your other products.
Just remember to use trackable source tags for each channel. This is the only way you'll know for sure whether your TikTok or your email list is sending you the most valuable traffic.
What Is the Biggest Mistake Sellers Make with Their Storefront?
Hands down, the most common—and most expensive—mistake is the "set it and forget it" mindset. So many sellers put in the work to build a beautiful Storefront, hit publish, and then don't touch it again for months, or even years.
A Storefront isn't a static brochure; it's a dynamic sales tool that needs to evolve with your brand.
You should be updating your Amazon Storefront as often as you update your social media. Treat it like a living, breathing part of your marketing, showcasing new launches, seasonal collections, and current promotions. That’s what keeps customers engaged and coming back for more.
The other major blunder is ignoring mobile. The vast majority of Amazon shoppers are browsing on their phones. Always use the preview function in the Store Builder to see how your design looks on a smaller screen. If your text is unreadable or your images are awkwardly cropped, you're creating a terrible experience for most of your visitors.
How Much Does It Cost to Create an Amazon Storefront?
This is the best part: building, designing, and publishing an Amazon Storefront is 100% free. Amazon doesn't charge a dime to use the Store Builder tool, host your store, or manage its pages.
The only real "cost" is the investment needed to get a registered trademark so you can enroll in Amazon Brand Registry, which is what unlocks the Storefront feature in the first place. Beyond that, any expenses come from creating your own creative assets, like professional photos or videos. But think of that as an investment in your brand's image, not a cost.
Feeling like you're spinning your wheels trying to build and optimize your brand on Amazon? ZonFlip offers complete, end-to-end account management to help you sell more and work less. From PPC and listing optimization to TikTok Shop integration, we turn complex data into profitable growth. Learn how we can accelerate your brand at https://www.zonflip.com.